Building AmazonWebShark With Hugo
Contents
In this post we’ll be building the AmazonWebShark blog.
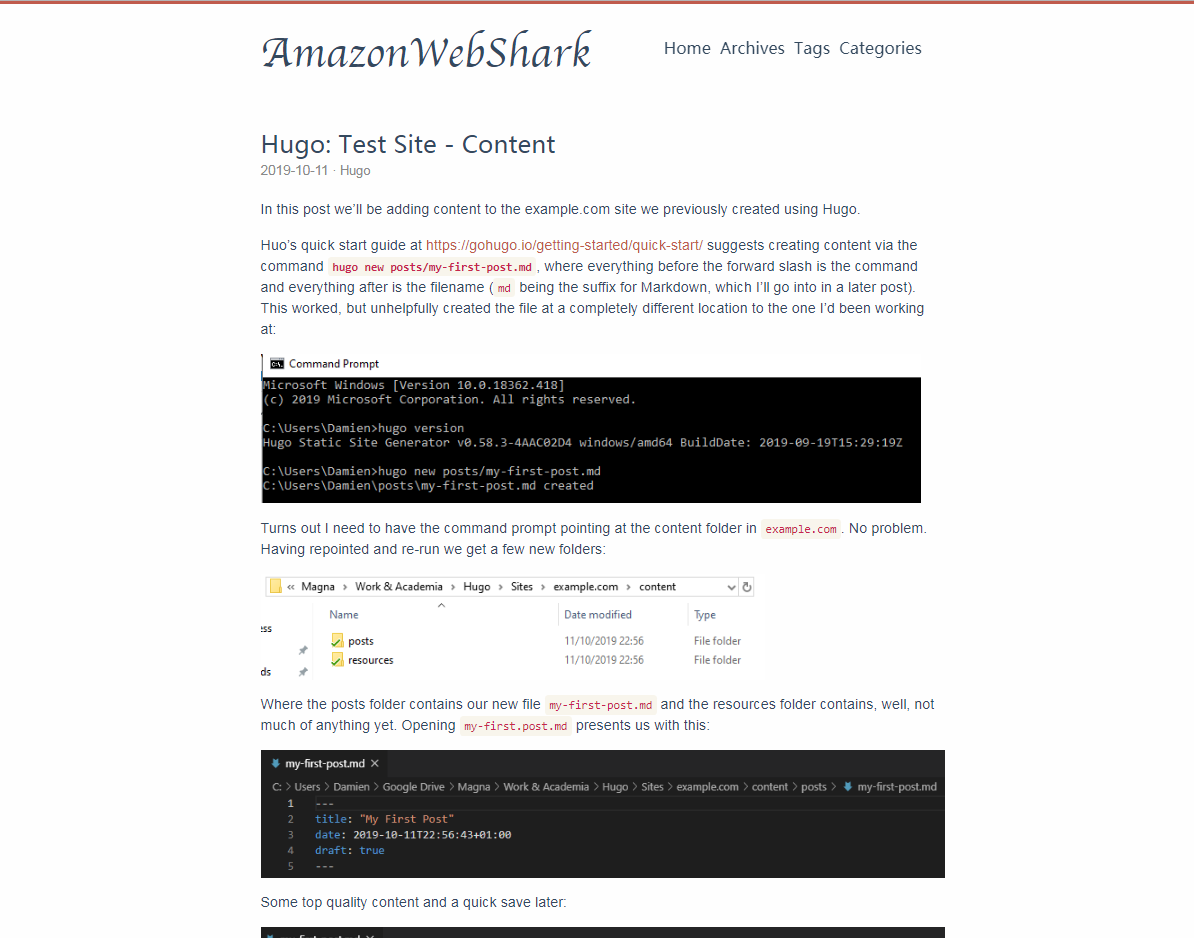
It’s time to start making AmazonWebShark! So far I’ve been writing the posts using Google Docs which lets me plan my formatting, check my spellings etc, but for any of the posts to make it to the blog they need to be in Markdown format. Markdown is a text-to-HTML conversion tool that is quick to pick up, requires no installation and is well supported. There are plenty of sites for reference, use cases and syntax - Google is your friend here.
Markdown doesn’t need an editor to be used (you could use Notepad if you wished), although there are several Markdown editors available that offer features like preview windows and IntelliSense. In my case I’m using Visual Studio Code as it’s free, has several Markdown plugins available and is a program I’m already using for other projects. Markdown’s learning curve quickly diminishes as you use it but there was one aspect I wanted to cover as it wasn’t immediately obvious: adding images.
Images are simple to add once you know what you’re doing. Markdown recognises images using the following syntax:

By default, Hugo looks in the Static folder for images when you trigger a build. Unless a different path is being used you can start the path from after this folder. In the interests of having a scalable file system I made a hierarchy with folders for year and month:

(For reference, the markdown syntax for the image above is )
This was replicated for the blog posts as well, located by default in the Content folder.
So we now have some posts in Markdown format with images. The next step is to choose a theme. We have covered this before, so this time I wanted to cover something new - swapping themes. Hugo looks for themes in the Themes folder, and this folder can contain multiple themes.
Of particular interest, each theme comes with an exampleSite folder which contains everything needed to build a site in Hugo using the theme chosen, including a config.toml file. This file can be pasted over the config file we’ve been dealing with so far, allowing us to see how the content looks with different themes without spending time directly editing the config file.
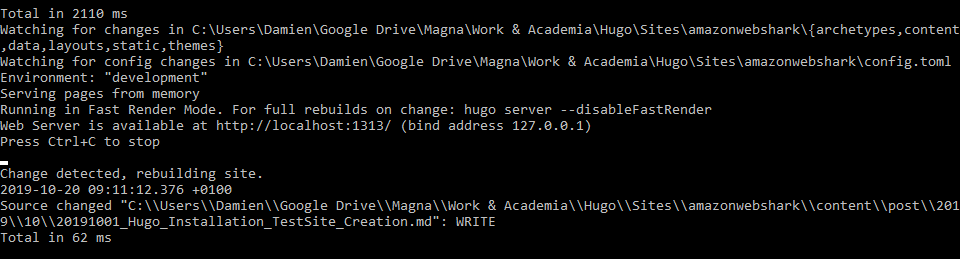
If you have hugo server running when changes are being made to the site’s files it’ll even rebuild the site as you save changes:
There’s one important consideration when trying out different themes. For the swap to work properly the naming conventions in your site hierarchy MUST follow those in the example site’s hierarchy. For example, the quick start used previously created new posts in a posts folder but some themes use a post folder instead - an inconsistency here will result in no content being displayed! If the folder names don’t match, a quick rename will be sufficient.
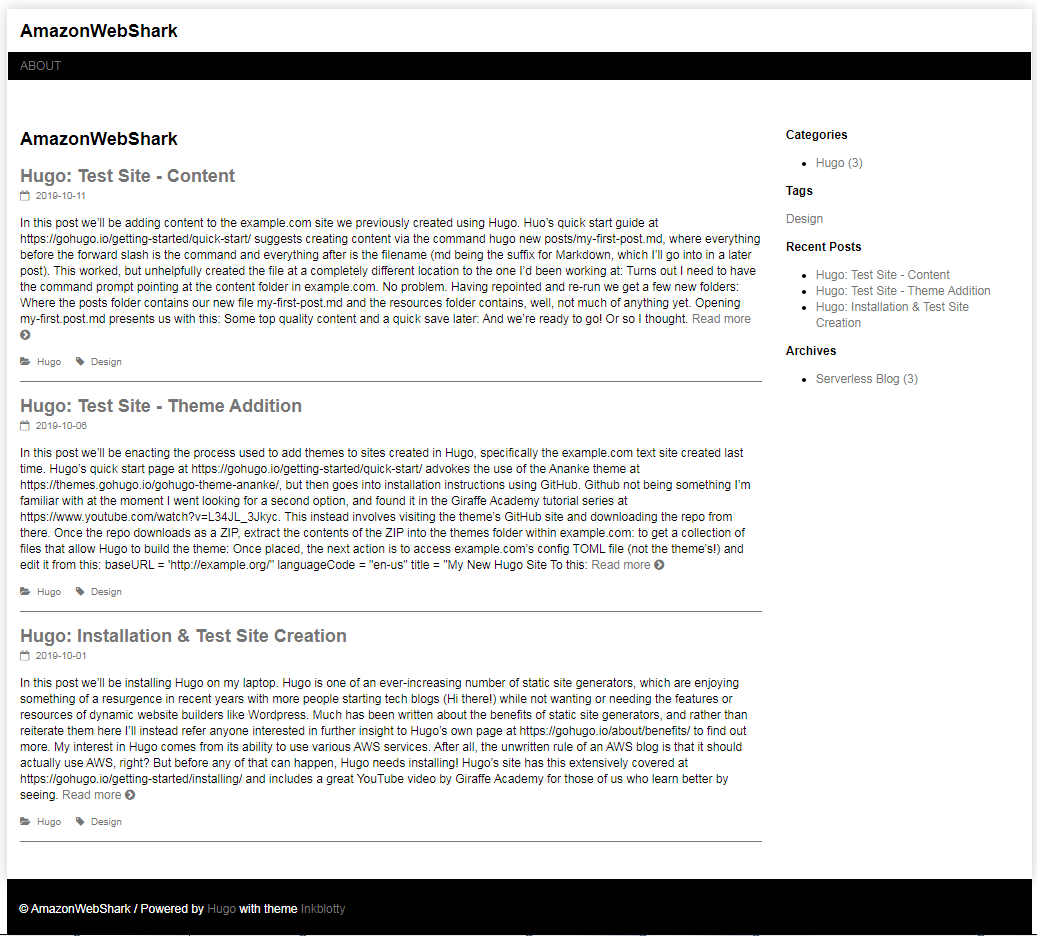
I whittled the choices down to InkBlotty and Even. Using both themes I firstly viewed the Home page:
Via InkBlotty
Via Even
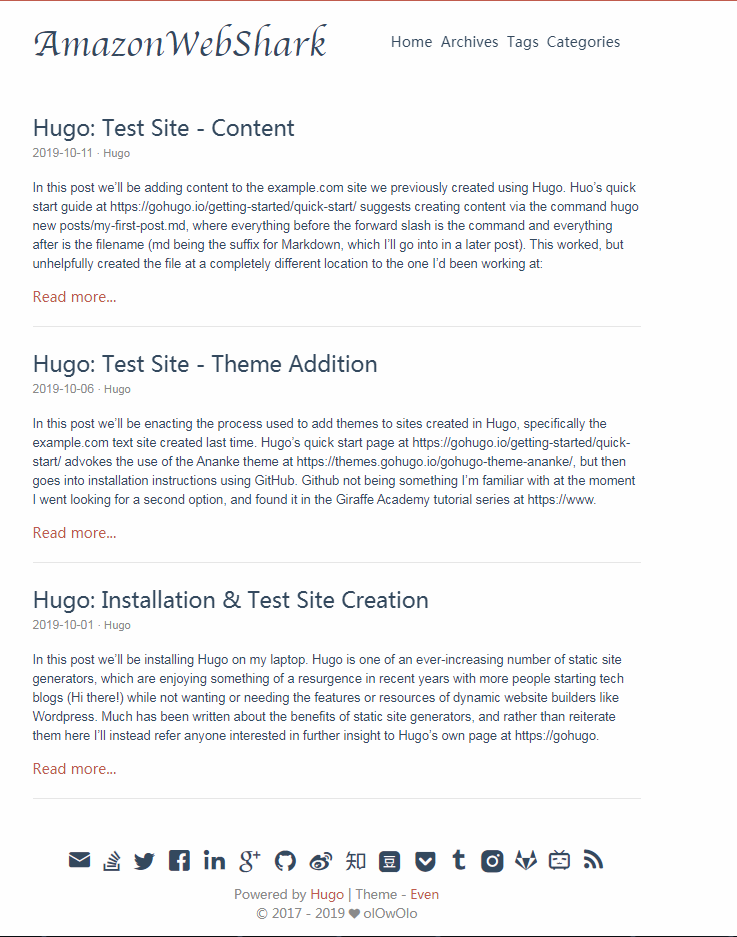
I prefer Even here as it shows five lines of text per preview while InkBlotty shows seven, consequently looking less busy.
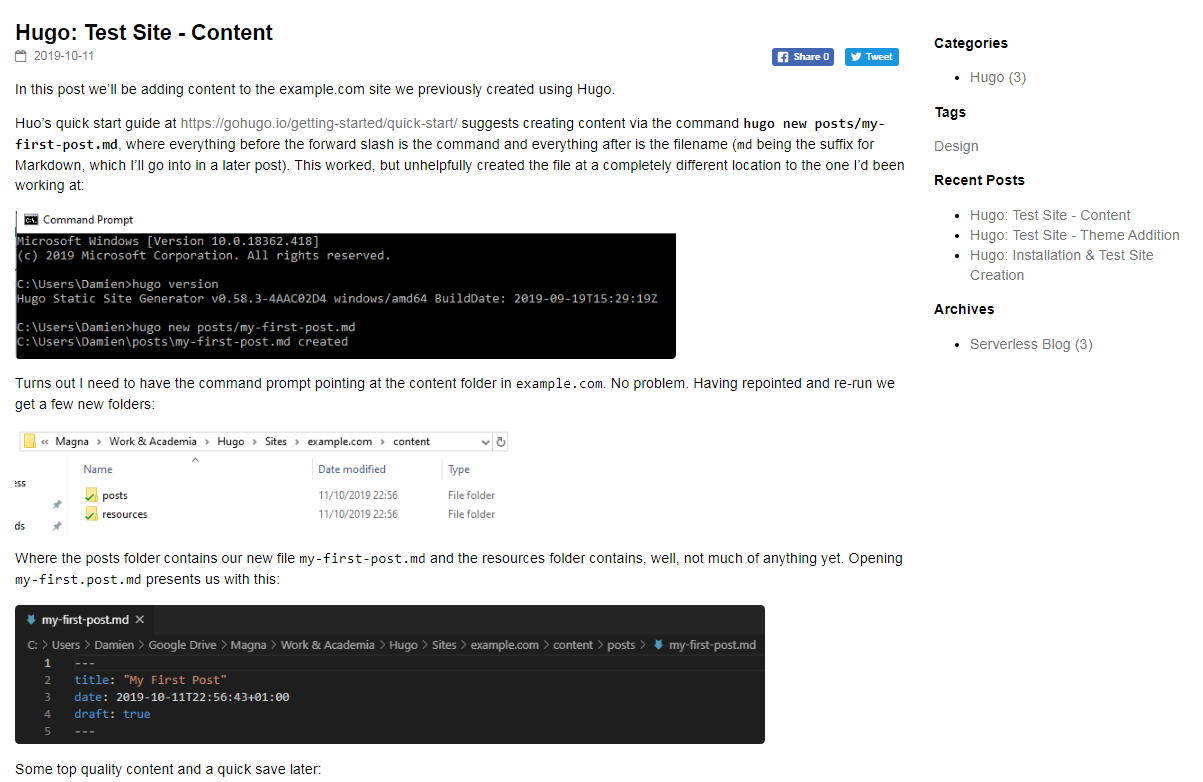
I then viewed one of the posts:
Via InkBlotty
Via Even
Here I again prefer Even - InkBlotty uses the same colour for text, links and code and has a constant sidebar menu, while Even uses black and red text and has its menu on the top of the screen.
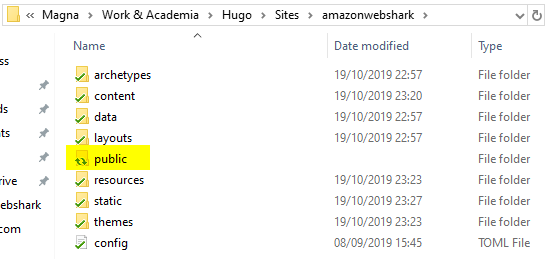
We’re now at the point of trying an actual build of the site! The command for this is the simplest yet: hugo. This triggers the creation of a new public folder, containing all the HTML, XML and Javascript needed for the site to run on the Internet.
Only one question remains - how do we get it online? In the next post we’ll look at this very question as we get our hands on AWS for the first time!
Thanks for reading ~~^~~
Author Damien Jones
LastMod 2019-10-16