Creating And Connecting To An Amazon Linux EC2 Instance
Contents
In this post I’ll be following Stephane Maarek’s AWS Certified Solutions Architect Associate course on EC2 fundamentals to create an Amazon Linux EC2 instance and then SSH into it.
We begin by launching an Amazon Linux 2 AMI T2 Micro with default settings and storage. A new security group is then created with the following values:
- Type SSH
- Protocol TCP
- Port Range 22
- Source 0.0.0.0/0 (This is NOT ideal but I’m reliably informed this is only temporary)
This is followed with the creation of a new key pair, and ultimately the creation of the EC2 instance itself.

We then make arrangements to access the new instance using the free and open-source SSH client PuTTY. PuTTY has an immediate problem in that it can’t use the EC2 keypair, although it comes with a key generator that is able to convert it to a PuTTY Private Key File that PuTTY understands. With this done PuTTY can now be configured using a hostname of ec2-user@[ip.address] and the private key file for authorisation.
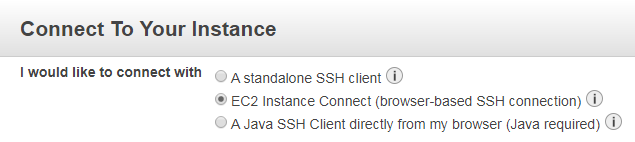
It is also possible to SSH onto an Amazon Linux 2 instance (and currently only these instances) using EC2 Instance Connect - a browser-based SSH connection offered in the AWS EC2 console:
Connecting to an instance by this method triggers a short delay followed by a new browser window opening containing the SSH terminal:
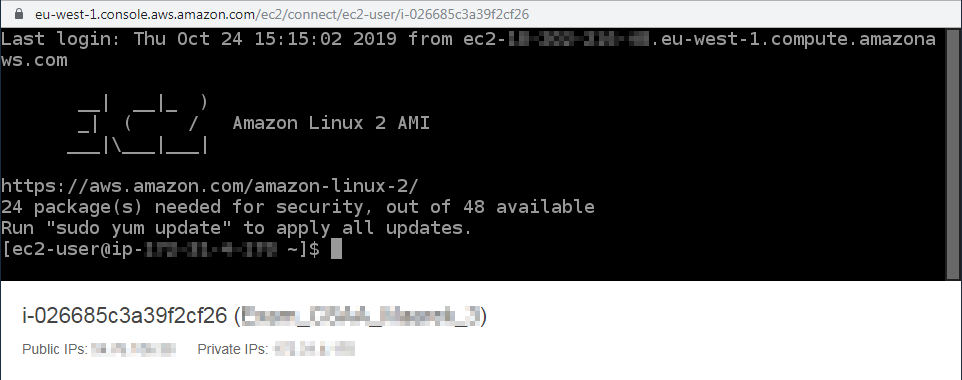
This negates the need for key pairs and firewall management (which can block certain SSH requests), although port 22 must be open for it to work. More information about EC2 Instance Connect can be found in the AWS user guide
When SSHing onto an EC2 instance, a connection timeout indicates either a potential issue with the security group assigned to the instance or that the connection is being blocked by a personal or corporate firewall, while a permission denied message indicates either that the key pair being used is incorrect or not specified, or that ec2-user is not being used.
Thanks for reading ~~^~~
Author Damien Jones
LastMod 2019-10-28